August 3, 2020: Car Wars: Painting Brimstone
Today I'm covering Brimstone in the first of a series of Car Wars painting articles we're going to be posting over the month of August. Follow the steps and try to recreate them, or just get inspiration for your own autos! Brimstone is part of Car Wars Miniatures Set 3. Click here to preorder Brimstone and all your other Car Wars needs.
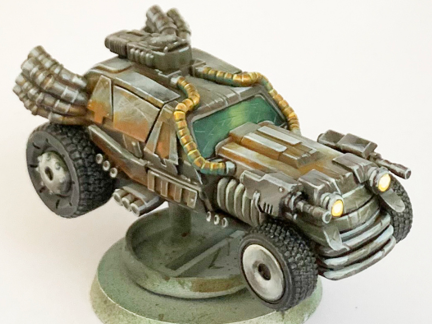
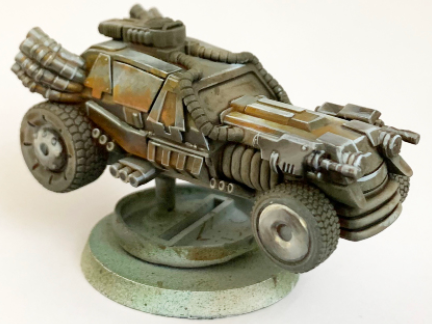
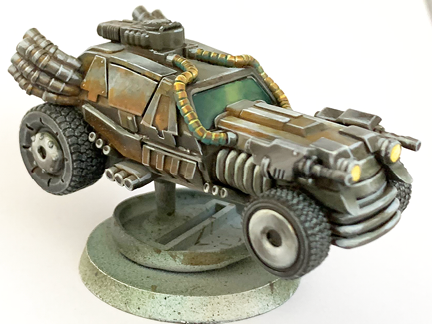
By the time I got to Brimstone, I'd painted a lot of the other cars already. I'd wanted at least one car to have a real scrapyard feel. Something that looked like some autoduellists had welded it together from whatever scrap they had laying around. Brimstone, with its seemingly mismatched plates, was ideal for this treatment. One important note, though – this is an early prototype, so don't be alarmed if yours doesn't look exactly like this one. I use a pushpin glued to unused miniatures bases as a holder to handle all the models I paint. After affixing Brimstone to this holder with the minimum amount of superglue needed (I would, of course, want to be able to break it loose when I was finished), I began airbrushing on a basecoat. I started with Citadel Fenrisian Gray. It's a nice cool bluish gray that works all right in the airbrush if you thin it down some. Then I blasted on some strips of Formula P3 Bane Base to vary the surface some. When everything was dry I gave the vehicle a wash with Citadel Agrax Earthshade to quickly define all the recesses. Lastly, you can see where I stippled some Citadel Trollslayer Orange on the door to add a little rust, before deciding I wasn't quite ready for that yet. If you want to pick up some of these paints for yourself, your Friendly Local Game Store likely stocks Citadel (Games Workshop's paint line) and may stock Formula P3 (Privateer Press' paint line) as well. If not, I've found that Noble Knight Games' Amazon store is a good place to pick up both brands.
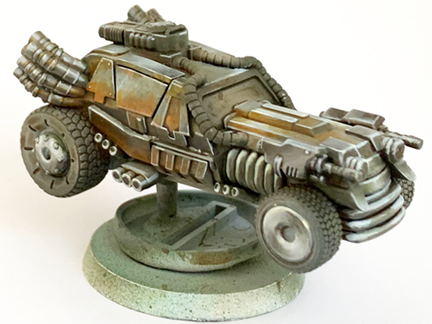
Rusty metal is still metal, and needs some highlights to show a little of that sheen coming through all that patina. I began stippling on thin layers of highlights with Fenrisian Gray on all the metal plates. Stippling, if you're new to the term, is applying paint in small rapid strokes that leave noticeable texture behind. I thin the paint a lot when I do stippling to allow that texture to build up in layers. It can take a little time to master but I love it as a technique for painting distressed areas like these rusted plates of metal. Once I was satisified with the Fenrisian Gray layers, I went over the a few parts of the same areas with P3 Menoth White highlight to make it pop just a little bit more. I also added a line of Fenrisian Gray along the exhaust pipes as a first highlight for these cylindrical shapes.
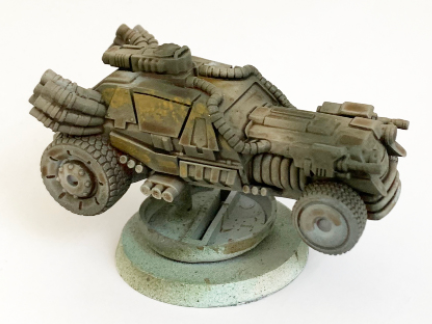
Now it's really time to add the rust. A lot of people get very good results with pigments and similar products for rust, but I've always had my own method. Formula P3's Bloodstone is a great warm orange-brown I use for a lot of rust effects. Here I've added a sort of thin glaze of it towards the bottom of the plates on the sides of the vehicle, and in the crevices on the exhaust pipes. Rust usually builds up the most in these areas as water collects there before it dries. While the Bloodstone is still wet I stipple in a little Citadel Trollslayer Orange to complete the effect.
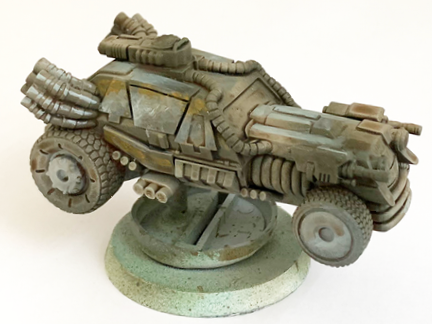
Now the plates each get a line of highlight along each edge with the Fenrisian Gray. Then along the upper edges I go back in with a few very thin lines of Menoth White Highlight in a few places to make them look extra sharp. This was also when I added some finishing touches to the exhaust pipes, blending the Fenrisian Gray highlights into a small amount of black to get a nice smooth gradient to help define their cylindrical shape. I also started on the hubcaps and front machine guns with highlights of the same colors.
Next, I move on to the other areas. This includes the machine guns I'd just started on in the last shot. I left the rust off of these to make them feel somewhat newer and, well, functional. I also start to define the headlights with lines of Fenrisian Gray along the edges. I also add a little more definition to the hubcaps. You should be able to see on the front hubcap how I've divided this circular shape into quarters of symmetrical dark and light areas. I leave some visible circular brush strokes to try to create the effect of spinning wheels.
Then I move on to the bumper and nearby areas, as well as the tubes along the side. For these I go for more of a chrome effect using less "rust" and smoother blends for a shinier appearance. I keep the Fenrisian Gray as the highlight but I've gotten the Bane Base back out for the shading here, which is why it has that barely noticeable green tint to it.
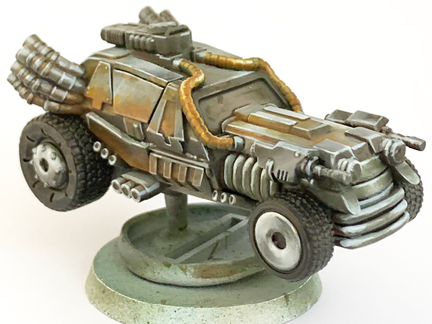
One of the few things I haven't covered yet are the other tubes leading from the engine to the rear mounted weapon. Since we're going with a rusty metal theme here I decided to use a somewhat oxidized copper just to give it a little variation. The basecoat for the copper is the same Bloodstone I've been using for the rust. I add in some smooth highlights of P3 Moldy Ochre. Some P3 Menoth White highlight is blended in at a few areas where I want the appearance of a really pronounced shine.
Each section of the tubing gets a thin highlight along the edge with Moldy Ochre. Then I use a mix of Citadel Caliban Green and Rhinox Hide to add a thin line between each of those sections. A thin glaze mixed from Citadel Temple Guard Blue and Caliban Green is added along the bottom of all the tubes as a patina.
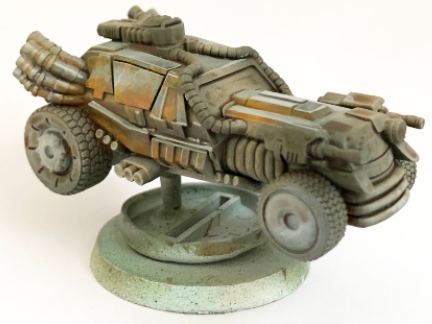
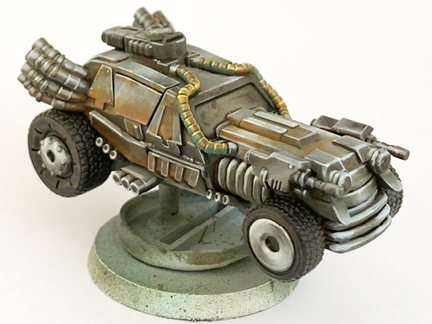
Now we're down to just the windshield and headlights. I picked green for the window since I thought it was a good contrast for all the rust. I used P3 Gnarls Green with a thin highlight of P3 Wurm Green down the middle to make it appear a little reflective. The headlights are Citadel Flash Gitz Yellow. I used a fairly thick dab of the yellow, and while it was still wet I added a little spot of white in the middle of it and worked it a bit to blend it into the yellow to give it that glowing appearance.
Last up, we have the battle damage. This is one of the most fun stages for me. I added several very light strokes of thinned Menoth White highlight all over the model. Not too many, or it will look weird. I like to concentrate a few streaks on the edge of the hood and roof along the vehicle's axis. It gives the illusion of the vehicle colliding with debris at high speeds.
The last touch is to add a darker streak, right above each of the lighter ones, to give the appearance of deep nicks. You can leave a few of the lighter streaks untouched. They'll look like less severe wear. And now Brimstone is ready to duel! There are no set color chemes in Car Wars, so you can paint your Brimstone any way you like. Or, if you like this look, you could try it on another car. Hammer, Pillbug, and Kodiak could all look great as rust buckets. Or you could try something more incongruous and see how a sleeker model like Pure Energy or Shuriken looks covered roof to wheels in rust. Make sure to preorder your copy of Car Wars and Miniatures Set 3 now so you can be one of the first to start painting! -- Ben Williams
|
 |
  August 3, 2020
 
|
||||||||||||||||||||||||||||||||||||||||||||||||||||||||||
|
|
|
|||||||||||||||||||||||||||||||||||||||||||||||||||||||||||
Copyright © 2024 by Steve Jackson Games. All Rights Reserved.